How to take a screenshot?
Various Methods to Take a Screenshot:
Using Microsoft Paint~
- Go to the location you wish to screen.
- Make a screenshot by pressing PrtScr (Print Screen) in order to take a screenshot of the whole screen. Or press Alt+PrtScr to take a screenshot of only the active window.
- Open any graphics program, for example Paint. (Start → Programs → Accessories → Paint.) Once in the program, press Ctrl+V, or in your toolbar: Edit –> Paste.
- Your screenshot will appear in the Paint window.
- Click File → Save as....
- Choose the file format png or jpg.
- Click Save.
Screenshots in Windows 8 (Alternative Way)~
In Windows 8, you can make screenshots by clicking Win+PrintScrn.
This key combo makes a screenshot of the current screen and saves it as a PNG image in the pictures folder by default, i.e. the folder Pictures (C:\Users\Name_Of_User\Pictures\Screenshots).
Every file automatically gets a name, like 'Screenshot (1).png', 'Screenshot (2).png', 'Screenshot (3).png', etc.
Taking a screenshot in Mac OS~
You do not need any additional software to take a screenshot with the Mac OS. You just need to know several (or at least one) keyboard shortcuts. You can see all of them in the settings of your mac (System Preferences → Keyboard & Mouse → Keyboard Shortcuts).
1. To capture the entire desktop, press Command-Shift-3. The screenshot will be automatically saved as a PNG file on your desktop.
2. To copy the entire desktop, press Command-Control-Shift-3. The screenshot will be placed on your clipboard for you to paste into another program.
3. To capture a portion of the desktop, press Command-Shift-4. A cross-hair cursor will appear and you can click and drag to select the area you wish to capture. When you release the mouse button, the screenshot will be automatically saved as a PNG file on your desktop.
Free Screen Shot Programs~
There are also plenty of free programs on the Internet that can help you when taking a screenshot.
One of these programs is Lightshot;

A free screen shot software that works with both Mac and Windows computers; offers a few instant editing features, and then the option to either save your screen shot as a file, or upload it to their website for free.
Creating an account will provide the additional advantage of never losing a screen shot, as the URL is bound to your account so you may find any screen shot you have taken in the past at another point.
- Download and install Lightshot. (Once installed it will already be running, and will auto-start itself every time you turn on your computer, so no opening of applications to worry about.)
- Then, when you wish to take a screen shot, simply press the Print Screen button on your keyboard, and select the area you wish to take the shot of. You do this by clicking and dragging your mouse.
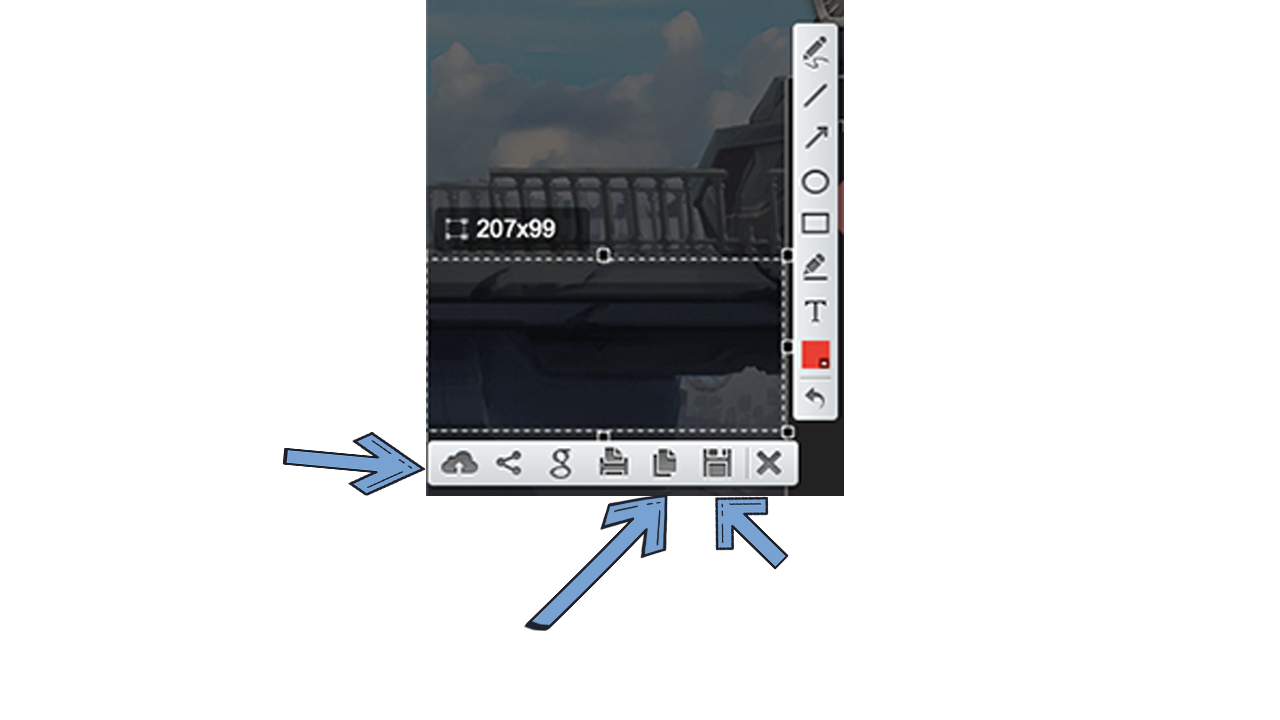
- Then choose how you want to share your screenshot. Refer to the image above if you are confused. You can upload the image online by clicking the cloud button - then just copy and paste the link of the image. You can copy the image to your clipboard. Or you can directly save the image on your computer.
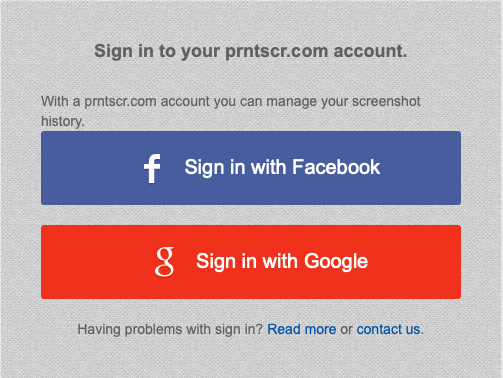
What the login should look like. You only need to do this once to register an account.
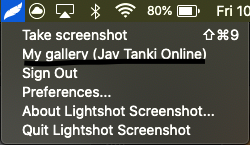
Lightshot layout. Press the "take screenshot" to take a screenshot by dragging as mentioned above.
Customer support service by UserEcho